Well, following my last blog, my next job was to replace the rear torsion bar end cap rubbers, that I had managed to damage. Having learnt about the mistakes I made earlier, this did not pose too much of a problem. The trick was to take the tension off the torsion bar. Then fit the rubber followed by the end cap, with the bolts just loose enough to still allow the spring plate to be re-tensioned. And then, once the bar was tensioned and the spring plate was back on its rest, finally tighten the four end cap bolts. This worked a treat and now I'm happy with the rear suspension. So now it's time for the main event, and that is fitting the Gearbox and Engine. Well, fitting the gearbox is easy. It simply slides into place onto the front mounting rubber and mounts at the rear with the cross-member fitted with two more mounting rubbers. Care has to be taken to ensure that the gear change rod fits comfortably into the universal joint just inside the chassis. The two big bolts fixing the cross-member to the chassis need to be really tight as they not only hold the gearbox in place but also take the weight of the engine. So I was careful to look up the correct torque and tighten them to the right setting. It was now a case of fastening the gear change rod into the universal joint.There is a small indentation in the rod from the gearbox and the grub screw on the coupling needs to locate into this indentation perfectly. This wasn't quite as easy as I'd hoped and in the end, I had to disassemble the coupling, whilst still in place, and slide it into place on the gearbox shaft and then rebuild the coupling all down the small hole in the chassis. But that done it worked and the grub screw could be tightened up and locking wire fitted. I could now test the gear change for the first time since the gearbox has been overhauled and, to my concern, I could not select 1st gear, no matter how I tried. 2nd, 3rd, 4th and Reverse were all fine. I decided not to panic and wait until the engine was running and turning the gears inside the box and then try again. Three more jobs now and the gearbox installation is done. First I had to fill the gearbox with oil. So I bought the correct gearbox oil and filled the gearbox until it just came out of the filler hole. Second I needed to fit the earth strap between the gearbox and the chassis around the front rubber mounting. Now I know I stripped the proper braided earth strap off the car when I removed the gearbox in the first place. But now I can't find it. So I ordered a new one from VW Heritage and they are out of stock. Now I remember the problems you can get if this earth strap is not in place as all the electrical power, when you operate the starter motor, has to find its way back to the chassis somehow and it finds that route down the clutch and accelerator cables and I've actually seen them glow red hot, which ruins the cables. So although I've ordered a new earth strap, I decided to make a temporary heavy duty one, just in case I forget a few months down the line. The final job on the gearbox was to fit the new clutch thrust bearing. This bearing has two spring clips holding it in place and no matter how I tried, I couldn't work out how they fit. Fortunately, there is always the internet and after a little studying I soon figured it out and on it went. The next job was to install the new drive shafts. I had already checked the condition of the constant velocity joints on the old ones and decided to replace them. It came as a surprise that two new complete drive shafts were actually cheaper than four constant velocity joint service kits. So two new shafts it was. After filling the constant velocity joints with graphite grease, the shafts could be fitted. These are held in place with six "Torque" screws on each joint and it is not easy tightening these up to the correct torque settings without damaging the small internal star socket on the end as the size is quite small and the torque quite high. One final job now and I can move onto the engine, and that is the starter motor. Now I know that the starter motor works OK as I had started the engine before I stripped it for renovation and it always seemed to be fine. So it was just a case of cleaning and painting it. Well, as you can see, it was very dirty and greasy. But with a good clean and a coat of chassis black it came up a treat and a quick test on the bench proved that it was still working fine. So now, at last, It's time to fit the engine. Now I rebuilt this engine back in January 2018, but up until now I have had no way of testing it. Now I was going to get my chance. The Engine slid into its mountings easily and the four bolts soon had it firmly in place. Next I had to rig up a temporary fuel tank. This was achieved by placing a 1 gallon petrol can at the front of the chassis and running a flexible hose into it from the fuel pipe on the front of the chassis. I then needed a 12v cable, from the battery feed to the starter motor to the HT coil. And finally I needed to devise a way to stand at the back of the engine and work the starter. I did this by mounting a large red push button switch into a plastic box with a length of cable with two spade connectors on the end of it. These connectors went on the main battery feed to the starter and the other one to the solenoid connector. Now when I press the push button with my foot, the solenoid is activated and the starter turns the engine. Well it was time for the first attempt and this didn't go so well. I had petrol leaks and no sign of life from the engine. However, after a backfire, I realised that the timing must be out and started to investigate. I soon discovered that I had the HT leads 90 degrees out, so the spark was going to the wrong cylinders. A quick alteration on the distributor and, after curing the fuel leaks, the engine started and it sounded great!!! Now the bad news. It had an oil leak! Investigation indicated that the push rod tubes were leaking on the left side. Now despite me having replaced all of the push rod tubes and seals with new ones, I decided to do it again. So I ordered all new tubes and seals again and some special aircraft grade sealant and stripped the engine again. The new tubes and seals arrived and I rebuilt the engine with great care. I started it again and it still leaked. I said a few choice words and stripped it again. This time I decided to spend more cash and buy the special push rod tubes that are spring loaded. I must admit they are far superior. It was during the rebuild again that I finally spotted the true problem. I noticed a small drop of oil on the bottom of the oil cooler and realised that it was not the push rod tubes that were leaking at all. The oil was running off the bottom of the oil cooler inside the fan housing and dripping down the side of the engine block over the push rod tubes.
So having bought 24 push rod tubes and 48 seals in total I now knew the true cause of the problem and ordered a new oil cooler and seals. So at last the engine was rebuilt and this time no leaks and to prove it below is a short Youtube film showing the engine running and more good news: With the engine running, I could now select 1st gear easily.
Well that's it for this episode, I'm hoping that the next one will be the preparation of the body for painting. You can contact me on hopcroftscoot@gmail.com
Time to look at the front axle and like most projects I started with great enthusiasm. So I stripped the front axle of all the brakes and suspension parts and removed the axle beam from the chassis.
My next job was to remove 50 years of road dirt from the axle beam which took a very long time and then finally give the beam a coat of rust converter and then chassis black.
It was not until I had done all of this work, and laid the axle down on the bench that I noticed that the axle appeared to be BENT! Careful measurement confirmed that the ends were indeed bent back from the centre by about 5mm. Disaster! I immediately went on the internet to see if it was a big problem. The answer was that the axle must be straight. The good news was that the internet said that, with a good press, it was possible to straighten it.
So I took the axle to my friends workshop and we carefully supported the ends of the axle on wood and then applied pressure to the centre struts of the axle, via another piece of wood in his press.
After a fair bit of pressure, the axle tubes straightened and we checked the tubes with a straight edge to ensure they were now level.
We were feeling pretty pleased with ourselves that we had achieved until I got the axle back to my workshop and I happened to turn the axle over and spotted what had happened to the axle end caps.
They had both crushed, under the weight of the press and were now beyond use. All of that work was now wasted and I had to find a replacement front axle.
That was not as easy as I thought, as no standard replacement axles were available, even in the USA.
So, in the end, I had to settle for an adjustable front axle. It's basically the same but the centre clamp points for the torsion bars are adjustable, allowing you to lower the suspension, if desired. Now as I don't want to lower my suspension these adjusters will just have to be set at the top (standard position). But there it is, fitted to the chassis and now I've got to rebuild it.
Stripping the old axle revealed another problem. Two of the leafs in the torsion bars were broken in the top tube. I doubt if I would have ever found that had the axle not been replaced. So now I had to order new torsion bars.
Along with the new the new torsion bars, I ordered all new ball joints and track rod ends. Now here comes the next mistake. The trailing arms cleaned up beautifully and I took them, along with the new ball joints back to my friend's workshop to have the old ball joint pressed out and the new ones pressed in. It took 8 tons of pressure to do this.
I took them back to my workshop and fitted them onto the new axle along with the renovated stub axles and new shock absorbers.
I wasn't over concerned, as everything was new, but the ball joints did seem very tight and so, just to be sure, I went back on the internet only to discover another problem.
The ball joints have notches in their caps and, according to the web, these notches have to be orientated front to back on the car. I had noticed the notches but had not checked what they were for. Now I had to go back to the car and check where the notches had finish up after we had pressed them in.
As luck would have it, three of the four ball joints were in the right orientation (Pure luck) but the upper right was 90 degrees out. So I had to order another ball joint and strip that side again, take it back to my friend, and replace the ball joint again. I didn't want to chance refitting the first one again in case two lots of pressing had damaged it.
It was about time I had a bit of luck and that came with the steering box. I fully expected to have to overhaul it. However inspection revealed absolutely no wear and no play. So it was just a case of cleaning it up and fitting it to the axle. The new axle has no mounting lugs, so I've had to estimate it's position and I'll have to adjust that once the body and steering column are back in place.
Time to clean up and refit the anti-roll bar with all new rubbers and clamps. No great problems there in fact I think it fits better that it did originally.
What was difficult was refitting the grease nipples, which would not cut into the holes in the new axle and in the end, I finished up fitting new ones. I also treated myself to a new , air powered, grease gun and I've been pumping grease into this new axle for some time now and still haven't managed to fill the new empty tubes yet. I now need to buy more grease.
It's now time to renovate the track rods and replace the track rod ends. No great problems here.
And complete with a new steering damper they were soon fitted.
Now, at last I could fit the brake back plates and the new discs, complete with all new wheel bearings and oil seals.
One problem, after fitting the discs was that the grease caps, that came with the discs didn't fit over the bearing clamp nut and the old caps are not fit to use. So I've had to put a new pair on back order.
Now it had been my intention to paint the new brake caliper "Red". However, when I opened the boxes, I found, to my surprise, that the new calipers were chrome plated. Now I don't know how good the chrome is but I felt it was worth leaving them as they are and see how they weather. I have already bought the red caliper paint, so if they do begin to rust I can always paint them later.
My next job is to replace the rear suspension, torsion bar and cap rubbers, that I have ruined, and then I'm going to reinstall the gearbox, that has already been overhauled.
At last, the chassis is back in my own workshop. Now I can start the mechanical restoration, to make the chassis ready for when the body arrives.
So the first thing to do is clean up all the areas that are still original and that means hours of wire brushing, cleaning and painting.
After removing 50 years of road dirt, the next job was to apply a coat of rust converter and then once dry a coat of "chassis black" paint. I'm a particular fan of Chassis Black as it provides excellent thick metal coverage combined with good road dirt protection and a good gloss finish
My next job is to raise the rear suspension. If you look at this original picture, you can see that the front of the car is high and the back is low. Now it is my intention to fit a tow bar to this car when it is done and tow my motorcycle trailer with it. This will enable me to show both the car and two of my motorcycles at vintage rallies. I had lifted the back of the car on it's suspension to see how much higher it needed to be for it to sit level before I started to strip the car and it appeared to need about 63mm (2.5"). After reading about the rear torsion arm information on the internet, I found that one notch on the inner splines actually changes the height of the car by exactly 63mm. This can be reduced by moving the outer splines one notch should I find that it's too much when I finally put the car back on the chassis.
So, after removing the rear brakes, Unbolting the trailing arms and swinging them downwards, I removed the torsion bar end caps. My next problem was how to release the tension on the spring plate and after turning the torsion bar one click, how to pull the spring plate back up again onto its rest. Now normally, with the weight of the car on the chassis, it is just a case of using a jack to push the spring plate back up again. But with no weight on the chassis, all a jack does is lift the whole chassis. So I had to devise a simple spring compressor as shown on this picture. This worked great, but I should have investigated the reassembly instructions further, because I should have refitted the end caps before retensioning to torsion bar. The result was that, with the spring plate under tension and back on its rest, the end cap would not line up with its fixing holes. I then made another bad decision. I decided to make another tool to force the end caps back on. This turned out to be a very bad decision, because inside the end cap is a large rubber mounting doughnut. The four threaded rods forced the cap on OK but crushed the rubber doughnut and damaged it beyond use. So I have had to strip it again and I am now awaiting the arrival of two new doughnuts. After reading further I discovered that what I should have done is refit the end cap before retensioning the torsion bar. But you live and learn. Anyway I left the end caps where they were for the time being and proceeded with the reassembly of the rear brakes. The first job was to clean up the back plates and rustproof and paint them. Next the shoes and springs were cleaned along with the brake adjusters. The back plate was then clamped into place with the axle end caps fitted with new oil seals and then the new wheel cylinders and cleaned brake shoes could all be fitted.
The good news was that the brake linings were in excellent condition and the drums only needed cleaning and painting.
It's now time to look at the pedal cluster and like everything on the car, it's showing it's age. So a complete strip was necessary. Some parts needed straightening and then they all needed painting and lubricating with copper slip grease.
Now with all new rubbers fitted it could be fitted back onto the chassis. Before doing that I remembered an old modification that we used to do back in the 1960's and that was to drill a small hole in the end of the hook where the clutch cable hooks on. The idea of this is that, when fitting, you hook the clutch cable over the hook and then fit a small split pin through the drilled hole. This stops the clutch cable slipping off the hook whilst fitting.
Now I could fit the new dual circuit master cylinder and all of the new brake pipes. I decided that, with a car of this age, it was a good idea to replace all brake components and so all flexible pipes were also replaced just to be on the safe side. Well that's it for this episode but on the next one there is big trouble with the front axle. You can contact me on hopcroftscoot@gmail.com
Progress has been really slow, over the past few months. Mostly due to my friend, Colin, closing down his business and taking a job elsewhere. So although my Karmann Ghia is still at his factory unit, he is mostly unavailable and the unit is locked up. However some progress has been made and work is continuing, if at a slower pace. I said, at the end of the last blog, that there was only a couple of small jobs to do and then the body could come off. Well as usual, one of those "small jobs" turned out to be a big job. We were looking at the offside rear wheel arch. Which showed signs of rusting through and waves in the metal where previous repairs had been done and then covered with filler. We decided that as we had repaired all the other bad areas properly, that this area should also have the same approach. So I ordered a new wheel arch panel and we cut out the old damaged area.
This area was then treated with rust killer and the new panel was welded into place. There are still a few small areas to repair but they are now to be left until the body has been removed from the chassis. We have now reached the point that all this replacement of metalwork has been for. When we started work it was immediately apparent that with so much body rot, if we took the body off the chassis, the body would simply break in half and if that happened, our chances of getting the doors to fit, after it was welded back together, was pretty slim. So the bracing bars and all of the replacement panels were necessary to strengthen the body first. So now it's time to think about removing the body from the chassis. Now in the mean time, Colin has been given some excellent engine stands (shown here in yellow) and with a little modification, we intend to use these stands to mount the body on, once removed from the chassis. This will enable the body to be rotated for the final underside welding and will also remain on the body during the paint spraying process. So the first job was to devise a method of mounting the body onto the stands and for that we needed supports at both ends of the body.
And here they are. These heavy duty brackets were fabricated and fitted the the bumper mountings at the front and rear. Now once the body is off, these brackets can be mounted onto the stands allowing us to rotate the body as on a "spit roast". And so, with all of the bolts removed, that fix the body to the chassis, and three strong men, the body is finally lifted off. I must admit, it does seem strange to see the body and the chassis in two different places. But this is what we have been working towards.
So now we can turn out attention to the chassis. Now both chassis pans are rotten and I had bought replacement pans some time ago and it was now time to unwrap them. To my surprise, although both had come from VW Heritage, they were quite different from each other. The right chassis pan seemed correct in every aspect, but the left one had no body mounting holes in it, no jacking point reinforcement, no captive nuts and a strange extra curved pressing that you can see on the front foot-well area. I spoke to VW Heritage and they were as puzzled as me. However they arranged to collect the rogue panel and send me a replacement. Great Service.
The next job was to remove the seat runners. This sounds like a small job, but it actually massive and very complex. Firstly you have to take very careful measurements of their position on the chassis and each of the three pieces relationship to each other, as there are no marked mounting points on the new chassis pans. Get it wrong and the seat won't fit or slide. Then you have to drill out hundreds of spot welds in order to remove the seat rails and their cross-member.
Now with the seat runners removed the old chassis pans can be cut out. I have removed the background from this picture to make it easier to see just how much has to be cut away leaving only the backbone of the car ready to receive it's new panels.
It now took hours of slow and laborious work to prepare the skeleton chassis ready to receive the new floor pans.
But things look a lot better now that the new floor pans are in place and ready to receive the old seat runners. Runners measured for position and clamped into place.
The slow job of welding up hundreds of holes made drilling out the original spot welds.
Well that's one side done. Now I've got to do it all over again on the other side.
Well that's the progress so far, here's hoping that things will move a little faster over the winter months.

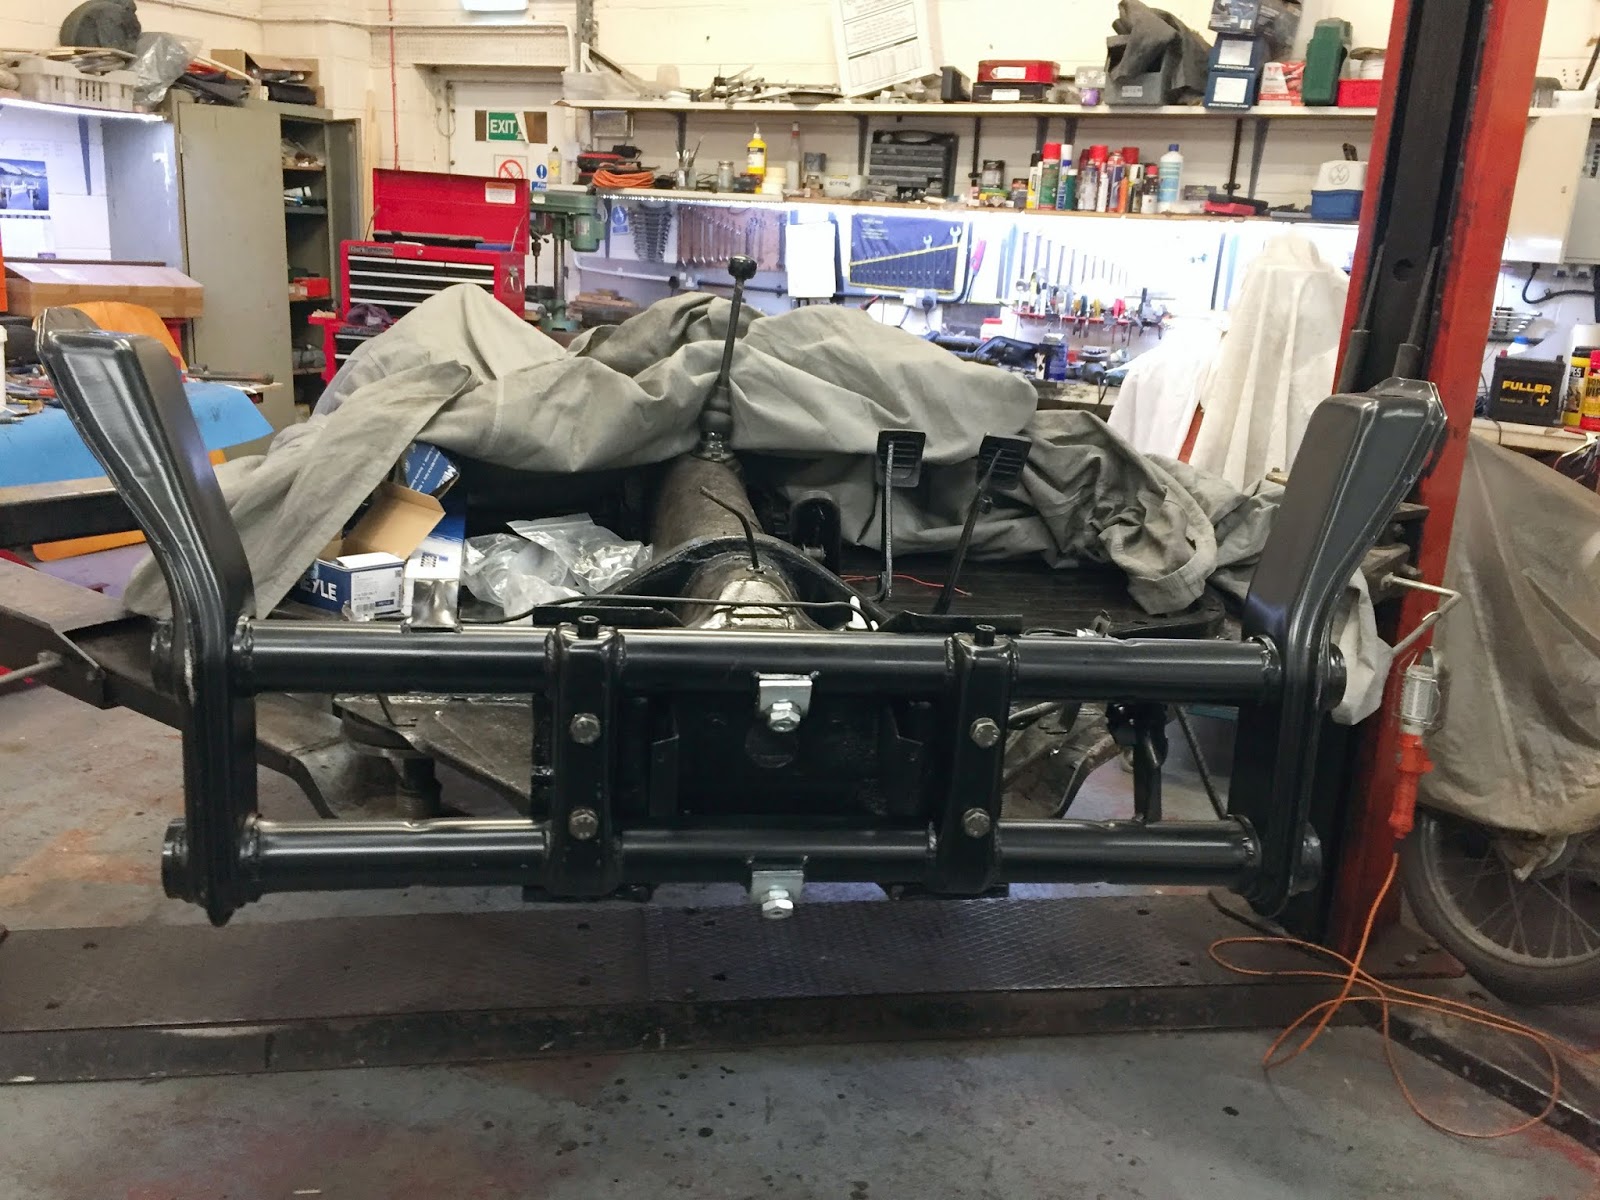
 Well, following my last blog, my next job was to replace the rear torsion bar end cap rubbers, that I had managed to damage. Having learnt about the mistakes I made earlier, this did not pose too much of a problem. The trick was to take the tension off the torsion bar. Then fit the rubber followed by the end cap, with the bolts just loose enough to still allow the spring plate to be re-tensioned. And then, once the bar was tensioned and the spring plate was back on its rest, finally tighten the four end cap bolts. This worked a treat and now I'm happy with the rear suspension.
 So now it's time for the main event, and that is fitting the Gearbox and Engine. Well, fitting the gearbox is easy. It simply slides into place onto the front mounting rubber and mounts at the rear with the cross-member fitted with two more mounting rubbers. Care has to be taken to ensure that the gear change rod fits comfortably into the universal joint just inside the chassis.
  It was now a case of fastening the gear change rod into the universal joint.There is a small indentation in the rod from the gearbox and the grub screw on the coupling needs to locate into this indentation perfectly. This wasn't quite as easy as I'd hoped and in the end, I had to disassemble the coupling, whilst still in place, and slide it into place on the gearbox shaft and then rebuild the coupling all down the small hole in the chassis. But that done it worked and the grub screw could be tightened up and locking wire fitted.
 Three more jobs now and the gearbox installation is done.
 The next job was to install the new drive shafts. I had already checked the condition of the constant velocity joints on the old ones and decided to replace them. It came as a surprise that two new complete drive shafts were actually cheaper than four constant velocity joint service kits. So two new shafts it was. After filling the constant velocity joints with graphite grease, the shafts could be fitted. These are held in place with six "Torque" screws on each joint and it is not easy tightening these up to the correct torque settings without damaging the small internal star socket on the end as the size is quite small and the torque quite high.
 So now, at last, It's time to fit the engine.
  Now the bad news. It had an oil leak! Investigation indicated that the push rod tubes were leaking on the left side. Now despite me having replaced all of the push rod tubes and seals with new ones, I decided to do it again. So I ordered all new tubes and seals again and some special aircraft grade sealant and stripped the engine again.
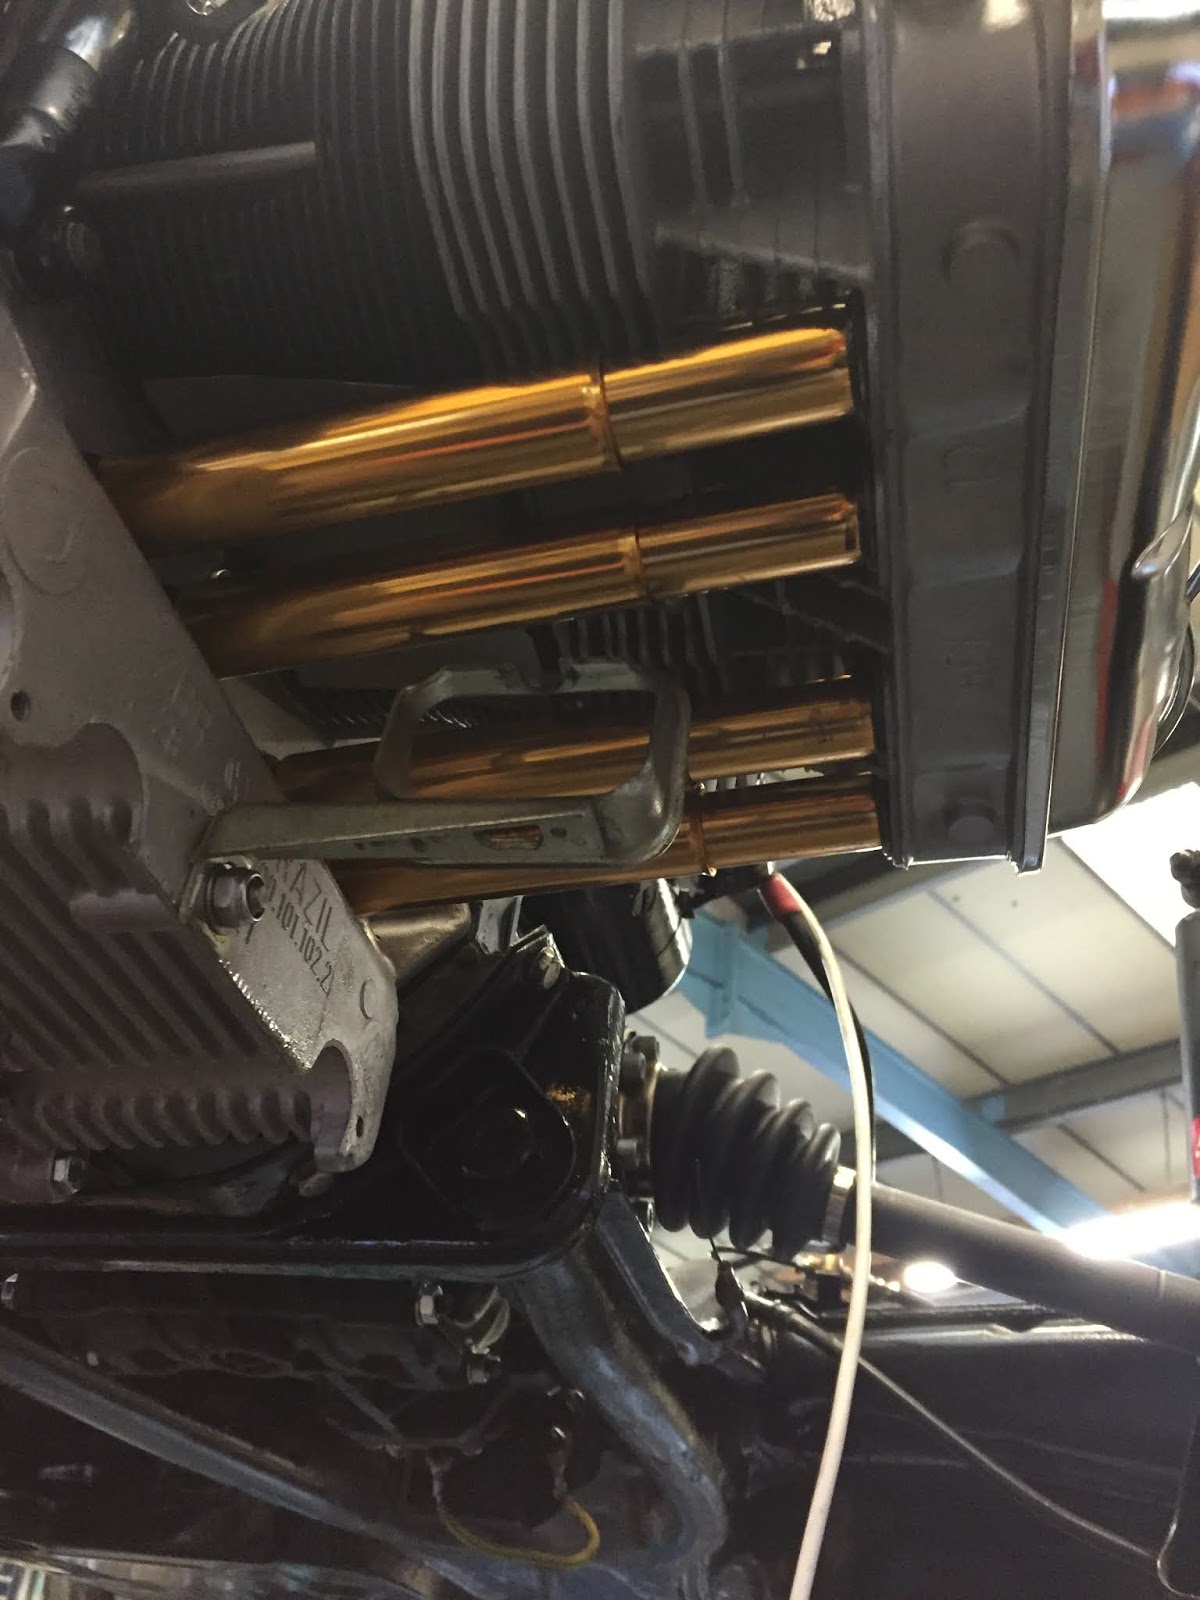 The new tubes and seals arrived and I rebuilt the engine with great care. I started it again and it still leaked. I said a few choice words and stripped it again.