
 Well, following my last blog, my next job was to replace the rear torsion bar end cap rubbers, that I had managed to damage. Having learnt about the mistakes I made earlier, this did not pose too much of a problem. The trick was to take the tension off the torsion bar. Then fit the rubber followed by the end cap, with the bolts just loose enough to still allow the spring plate to be re-tensioned. And then, once the bar was tensioned and the spring plate was back on its rest, finally tighten the four end cap bolts. This worked a treat and now I'm happy with the rear suspension.
 So now it's time for the main event, and that is fitting the Gearbox and Engine. Well, fitting the gearbox is easy. It simply slides into place onto the front mounting rubber and mounts at the rear with the cross-member fitted with two more mounting rubbers. Care has to be taken to ensure that the gear change rod fits comfortably into the universal joint just inside the chassis.
 The two big bolts fixing the cross-member to the chassis need to be really tight as they not only hold the gearbox in place but also take the weight of the engine. So I was careful to look up the correct torque and tighten them to the right setting.
 It was now a case of fastening the gear change rod into the universal joint.There is a small indentation in the rod from the gearbox and the grub screw on the coupling needs to locate into this indentation perfectly. This wasn't quite as easy as I'd hoped and in the end, I had to disassemble the coupling, whilst still in place, and slide it into place on the gearbox shaft and then rebuild the coupling all down the small hole in the chassis. But that done it worked and the grub screw could be tightened up and locking wire fitted.
I could now test the gear change for the first time since the gearbox has been overhauled and, to my concern, I could not select 1st gear, no matter how I tried. 2nd, 3rd, 4th and Reverse were all fine. I decided not to panic and wait until the engine was running and turning the gears inside the box and then try again.
 Three more jobs now and the gearbox installation is done.
 First I had to fill the gearbox with oil. So I bought the correct gearbox oil and filled the gearbox until it just came out of the filler hole.
Second I needed to fit the earth strap between the gearbox and the chassis around the front rubber mounting. Now I know I stripped the proper braided earth strap off the car when I removed the gearbox in the first place. But now I can't find it. So I ordered a new one from VW Heritage and they are out of stock. Now I remember the problems you can get if this earth strap is not in place as all the electrical power, when you operate the starter motor, has to find its way back to the chassis somehow and it finds that route down the clutch and accelerator cables and I've actually seen them glow red hot, which ruins the cables. So although I've ordered a new earth strap, I decided to make a temporary heavy duty one, just in case I forget a few months down the line.

The final job on the gearbox was to fit the new clutch thrust bearing. This bearing has two spring clips holding it in place and no matter how I tried, I couldn't work out how they fit. Fortunately, there is always the internet and after a little studying I soon figured it out and on it went.
 The next job was to install the new drive shafts. I had already checked the condition of the constant velocity joints on the old ones and decided to replace them. It came as a surprise that two new complete drive shafts were actually cheaper than four constant velocity joint service kits. So two new shafts it was. After filling the constant velocity joints with graphite grease, the shafts could be fitted. These are held in place with six "Torque" screws on each joint and it is not easy tightening these up to the correct torque settings without damaging the small internal star socket on the end as the size is quite small and the torque quite high.
One final job now and I can move onto the engine, and that is the starter motor. Now I know that the starter motor works OK as I had started the engine before I stripped it for renovation and it always seemed to be fine. So it was just a case of cleaning and painting it.
Well, as you can see, it was very dirty and greasy. But with a good clean and a coat of chassis black it came up a treat and a quick test on the bench proved that it was still working fine.
 So now, at last, It's time to fit the engine.
 Now I rebuilt this engine back in January 2018, but up until now I have had no way of testing it. Now I was going to get my chance. The Engine slid into its mountings easily and the four bolts soon had it firmly in place. Next I had to rig up a temporary fuel tank. This was achieved by placing a 1 gallon petrol can at the front of the chassis and running a flexible hose into it from the fuel pipe on the front of the chassis. I then needed a 12v cable, from the battery feed to the starter motor to the HT coil. And finally I needed to devise a way to stand at the back of the engine and work the starter.
I did this by mounting a large red push button switch into a plastic box with a length of cable with two spade connectors on the end of it. These connectors went on the main battery feed to the starter and the other one to the solenoid connector. Now when I press the push button with my foot, the solenoid is activated and the starter turns the engine.
Well it was time for the first attempt and this didn't go so well. I had petrol leaks and no sign of life from the engine. However, after a backfire, I realised that the timing must be out and started to investigate. I soon discovered that I had the HT leads 90 degrees out, so the spark was going to the wrong cylinders. A quick alteration on the distributor and, after curing the fuel leaks, the engine started and it sounded great!!!
 Now the bad news. It had an oil leak! Investigation indicated that the push rod tubes were leaking on the left side. Now despite me having replaced all of the push rod tubes and seals with new ones, I decided to do it again. So I ordered all new tubes and seals again and some special aircraft grade sealant and stripped the engine again.
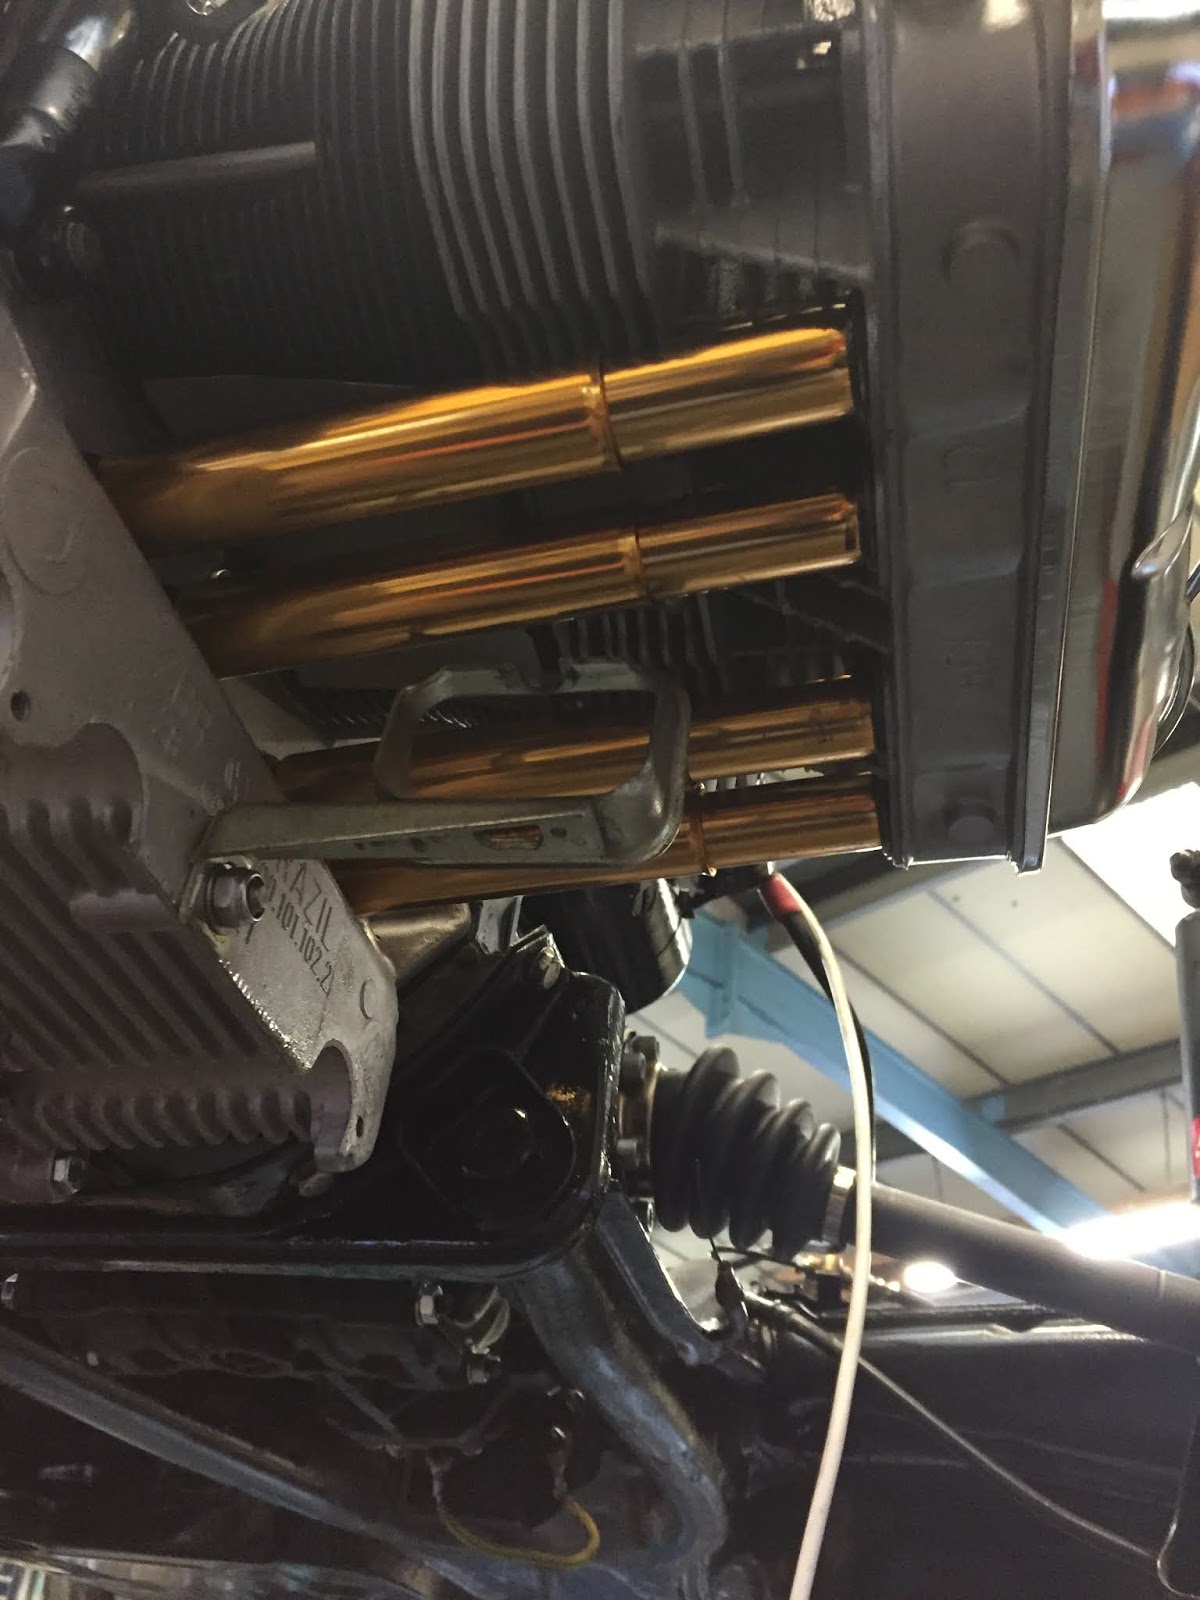 The new tubes and seals arrived and I rebuilt the engine with great care. I started it again and it still leaked. I said a few choice words and stripped it again.
 This time I decided to spend more cash and buy the special push rod tubes that are spring loaded. I must admit they are far superior. It was during the rebuild again that I finally spotted the true problem. I noticed a small drop of oil on the bottom of the oil cooler and realised that it was not the push rod tubes that were leaking at all. The oil was running off the bottom of the oil cooler inside the fan housing and dripping down the side of the engine block over the push rod tubes.

So having bought 24 push rod tubes and 48 seals in total I now knew the true cause of the problem and ordered a new oil cooler and seals.
So at last the engine was rebuilt and this time no leaks and to prove it below is a short Youtube film showing the engine running and more good news: With the engine running, I could now select 1st gear easily.
Well that's it for this episode, I'm hoping that the next one will be the preparation of the body for painting.
You can contact me on hopcroftscoot@gmail.com
Copyright 04.07.20 all rights reserved.
My Other Blogs:
1961 BSA A10 Super Rocket Motorcycle:
http://60sclassicmotorbikes.blogspot.com/2012/07/before.html
1961 Ariel Arrow Super Sport Motorcycle :
http://60sclassicmotorbikes.blogspot.com/2014/01/1961-aerial-golden-arrow-restoration.html
Miniature Land Rover Defender:
http://miniaturelandrover.blogspot.com/2016/02/1-miniature-land-rover-defender-idea.html?view=timeslide
Motorcycle Trailers / Caravans:
http://motorcycletrailersandcaravans.blogspot.com/2018/01/1-motorcycle-trailers-problem.html
No comments:
Post a Comment