Wednesday, 16 November 2022

22. Karmann Ghia Restoration - Paint


Following my last blog, I decided that I had to put the body back on the chassis to ensure that the new wheels would fit under the wings, before I sent it off for painting. So I had to devise a way of lifting the body onto the chassis on my own. 

The answer was to lift the body with my car lift, using poles across under the body and then position the chassis under the lift, put the chassis on castors and remove the wheels.

Now the chassis could be positioned in exactly the right place, using the stands on castors, and the body slowly lowered into position. 


Now with the body on the chassis, I could try fitting the new wheels and tyres and, at last, some good news. The wheels fit!! Brilliant. So now I can take the body off again, put it back on the rotating spits and get it off for painting. 


I decided to fit the bonnet and boot catches before sending the car away as they tend to fall open and hit the stands when the body is turned upside down. This posed two problems; The boot (engine cover) lid catch requires a pull wire to operate the catch and this was missing (The previous owner just had a bit of wire under the rear bumper to open the catch). I managed to buy a pull cable and knob but could not get any kind of mounting boss for it so I decided to make one. This worked and the engine cover lid can now be released by pulling the knob inside the car.

The front bonnet release posed another problem, as the bonnet release lever is mounted on the glove box and, as you can see, the glove box was beyond help. 


The answer was to buy a new plastic glove box and mount the original lever and cable onto it. As you can see, this was successful, but posed another problem. As the new glove box won't be fitted until after the body is painted, how can I provide a bonnet release to open the bonnet with no glove box fitted? The answer came to use the old wire from the engine cover release and mount it through a hole in the inner wing with a pull under the wheel arch. 


So the Karmann Ghia body finally went off for paint in February 2022 and that gave me the opportunity to do some other small jobs ready for when it returns. 

The first was the seats. I wanted to fit them to the rails on the chassis and make sure that they slide and adjust correctly. Well this was great and they slid on quite easily and adjusted fine. However I then noticed that the two black plastic kick guards on the bottom of the seats were both broken. 


So I tried to buy some new ones with no success, I looked on all the web sites world wide, but no one had any. So I decided to make some out of aluminium.


What do you think?


The next job was the Tow Bar. It is my intention tow my box trailer with the Karmann, when it is done, to allow me to take my bikes and the car to vintage shows and show them all. Well getting a tow bar was difficult, but I finally manged to buy one for a beetle. Now once the body is back on the chassis, I will probably have to cut the ball off the bar and extend it to reach the back of the Karmann. However, in the mean time I needed to manufacture the fixings for the tow bar which did not come with it. So I made two new "U" bolts to fit over the torsion tubes and two heavy right-angle brackets for the gearbox mounts. 

Whilst doing these preparation jobs, the body has now been at the paint shop for 6 months (They said it would take two months) and I got a call to say that they had decided that they had "Bit off more than they could chew" and would I please take it away! They had managed to get it into "filler coat" but that was it. Furious, I had to organise the relay truck to take it away again and bring it back to my workshop.

So I had to track down another man who could finish the car and arrange to deliver it to him. So on 17th September 2022 the Karmann body went, on the relay truck again,  to the second painter, called "Coolblu" in Swadlingcote. 

In the mean time, I decided that it would be a good idea to change the generator, on the engine, for an alternator. So I bought the kit and set about fitting it. As you can see, this went well, and apart from having to cut a small boss off the oil filler stand, it fitted perfectly.


Finally, last night (15th November 2022) I went to pick up the painted body and it is beautiful. It's now back in my workshop and ready for the long reassembly.


On the next blog, I hope to have the body back on the chassis.

Copyright 16.11.22 all rights reserved.

My Other Blogs:
1961 BSA A10 Super Rocket Motorcycle:
http://60sclassicmotorbikes.blogspot.com/2012/07/before.html

1961 Ariel Arrow Super Sport Motorcycle :
http://60sclassicmotorbikes.blogspot.com/2014/01/1961-aerial-golden-arrow-restoration.html

Miniature Land Rover Defender:
http://miniaturelandrover.blogspot.com/2016/02/1-miniature-land-rover-defender-idea.html?view=timeslide

Motorcycle Trailers / Caravans:
http://motorcycletrailersandcaravans.blogspot.com/2018/01/1-motorcycle-trailers-problem.html


Saturday, 22 January 2022

21. Karmann Ghia Restorations - The Doors


Well it's been a very long time since my last blog and progress has been very slow, mostly due to Covid lockdown. But I am finally making progress. As I mentioned on my last blog, my next job was to weld new pieces of metal onto the kickboards under the rear seat. This was done and painted and looked OK. 

I was then looking at my new wheels and the wheel well at the front of the car and decided to try one of the new wheels into the hole. Well surprise surprise, it didn't fit! The new wheel and tyre being bigger would not go down into the well and the horn support bracket and jack clamp all got it the way. Well there was nothing for it but to remove both brackets and then panel beat the inner wings on both sides to widen the wheel well. 


That done I could then try the new wheel in the well and find a new position for the jack clamp and weld it back into place. I then had to design and make a new horn bracket and try that in place with the horn attached to ensure that it would not foul the spare wheel. Designing the new horn bracket was more complicated than I had expected as I had to ensure that I could adjust it's position, with the horn on it, with the spare wheel in place. This involved drilling a hole in the bodywork and bolting the new bracket in place, then turning the bracket until everything cleared the wheel. Once in the right place, the bracket could be welded in place. The bolt could then be removed and the hole welded up again. But there it is, done.


Now the job I have not been looking forward to. The doors. Inspection of the doors showed rot at the bottom of each door, but this only required plating and welding. The main problem was down the slot on the top where the window passes through. Just inside this slot are two plates, one on each side. These plates carry 7 rubber buffers, that fit either side of the window to stop it rattling. The holes that carry these buffers had rotted away. I had no choice but to cut open the top of the doors and make new plates. Here you can see the door cut open and one of the new plates held in place ready for welding. I was lucky when making the plates that my small press was just wide enough to do the small bend along the top edge. The holes that you can see in the new plate for the buffers were drilled right through with the door. The other holes, only in the new plate, are for welding through to hold the plate in place.

The top of the door then had to be carefully welded back on again and refinished to a smooth condition. The whole process then had to be repeated for the other door. 


The whole process took days  but in the end the doors were fit to spray and use.


Finally the doors could be fitted to the body to see if they still fit and amazingly, they do!! I then had to look at the chrome trim fixing holes down the side of the body. Now the ones in the doors were still there but most of the ones on the replacement body panels were missing. So, to get them in the right places, I used a laser to project a straight line onto the side of the body, passing through as many holes as possible and then marked and drilled the new ones in place. It's interesting to note that the indentations on the replacement panels, for the holes, were all in the wrong places.


I could now refit the rear boot lid and that just leaves the bonnet (Hood) to be fitted and the body can go off for paint.

So, I have actually booked the body in for paint in two weeks time. 

Now having booked that, it has now occurred to me that, as I had so much trouble getting the spare wheel to fit, will the new wheels and tyres fit under the wheel arches?? So my next job is to fit the body onto the chassis and try the wheels in place. FINGERS CROSSED!!


Saturday, 5 June 2021

20. Karmann Ghia Restoration - Do Things Fit?


I've now reached the stage where I need to check if things fit, on my Karmann Ghia restoration, before the body goes off for painting. So the first thing to take a look at is the bumpers. Now I had already bought replacement, stainless steel, bumpers and whilst waiting for my friend to do more welding, I had successfully assembled them and been saving them for this moment. 

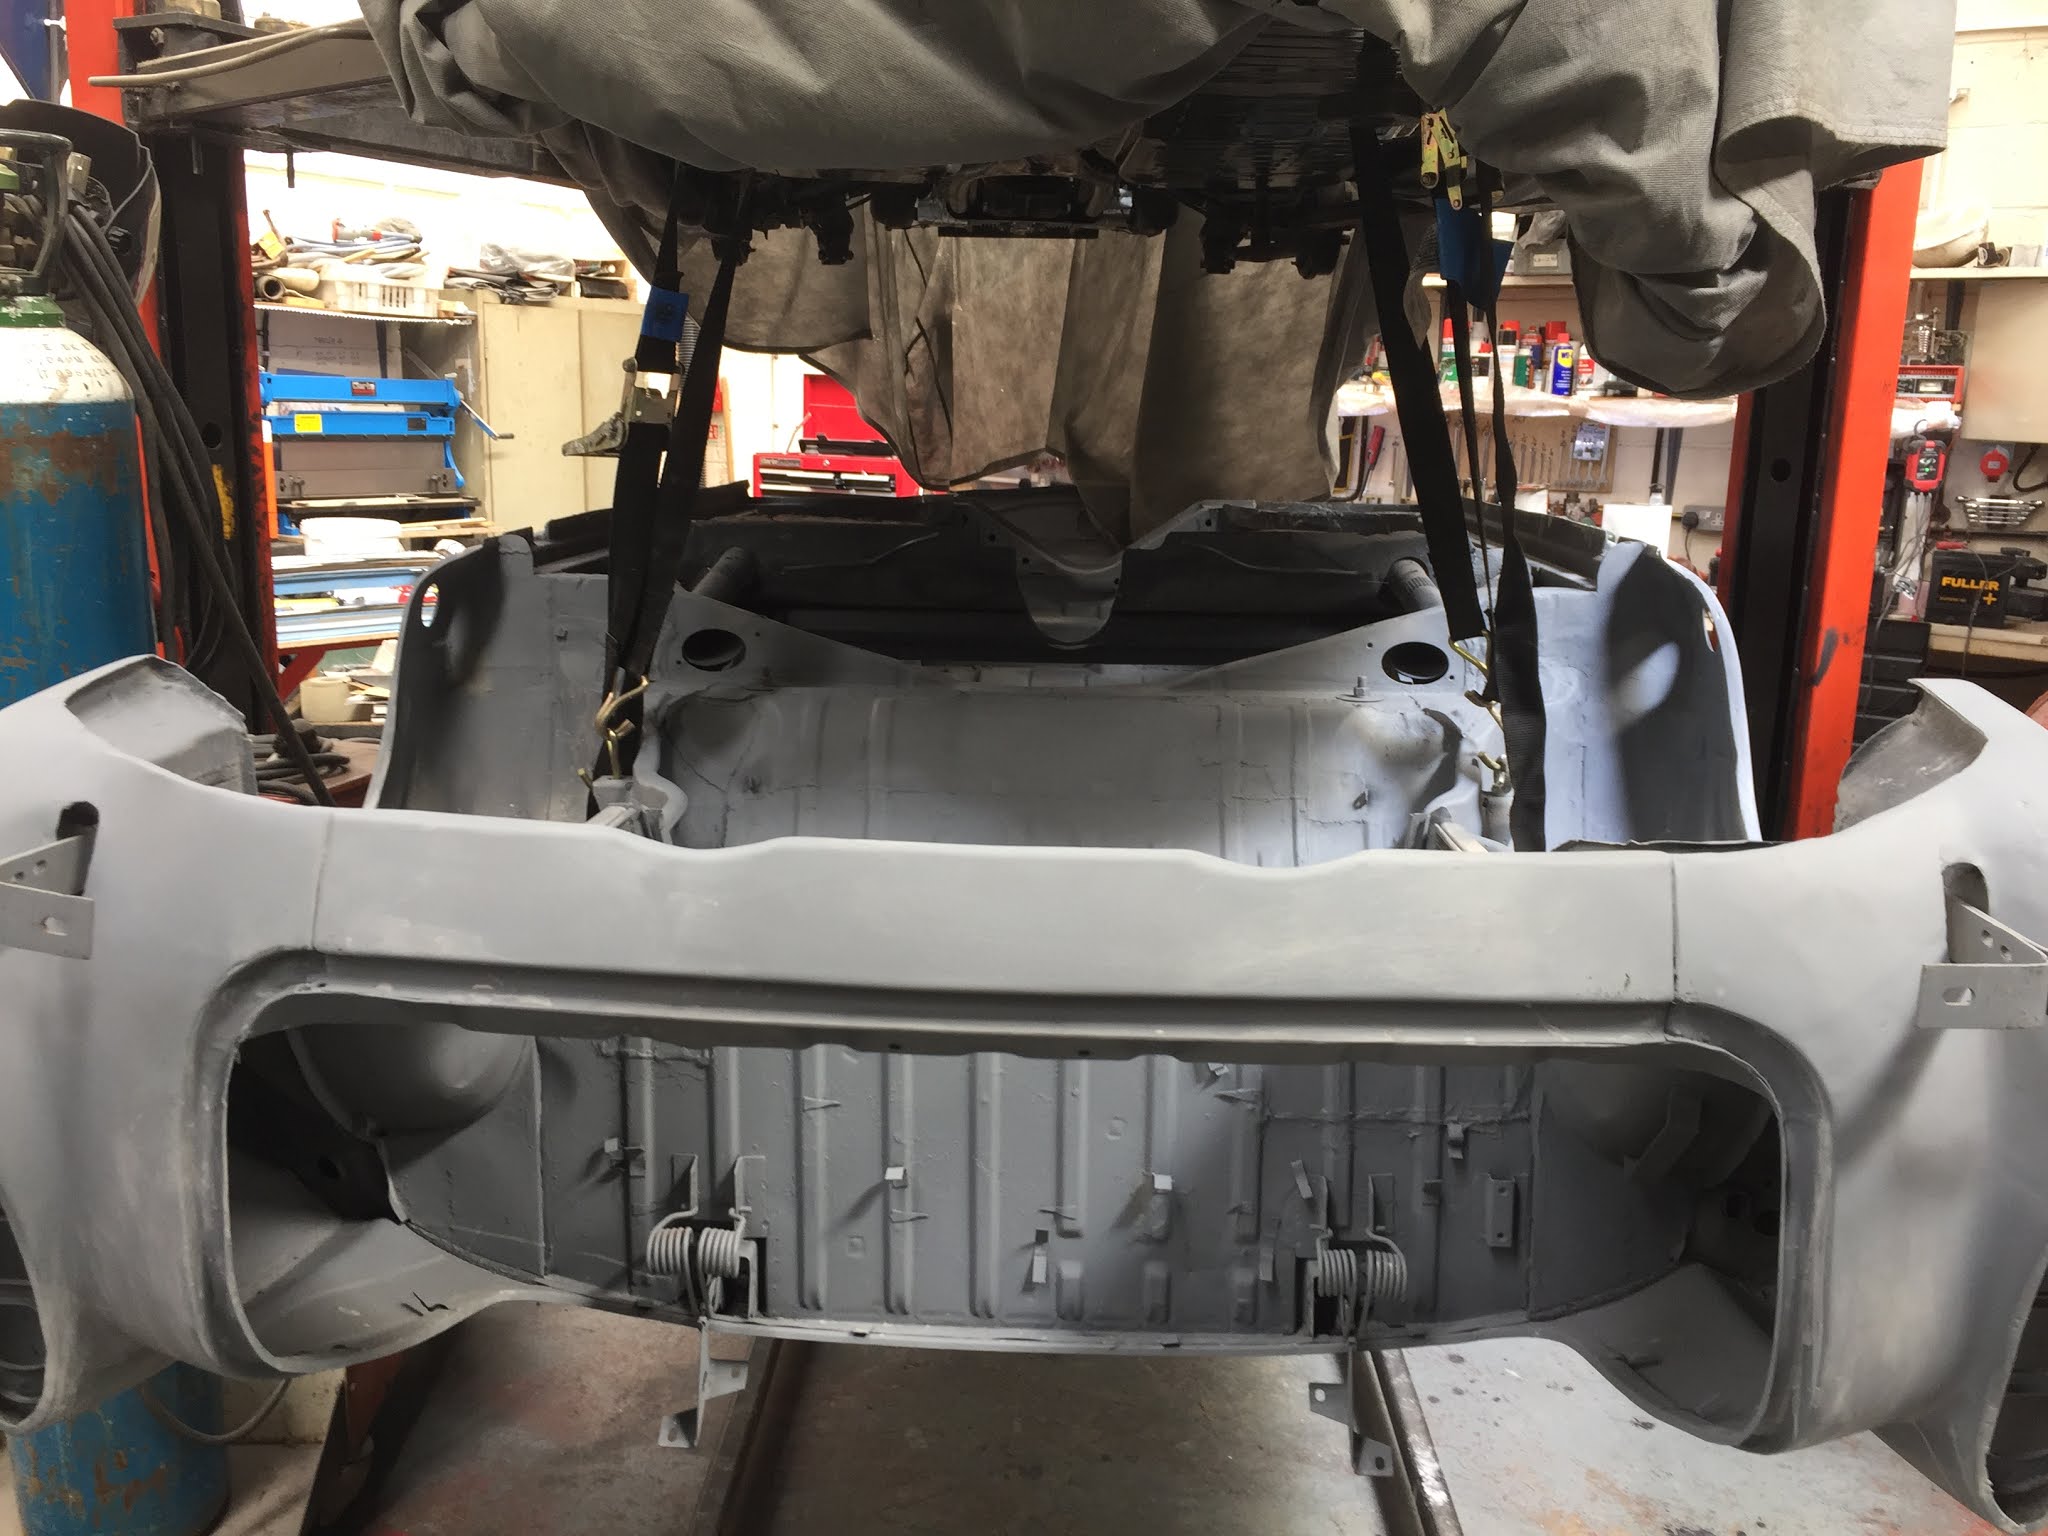
So, starting at the back of the car, the first problem to overcome was that the bumper mountings were currently being used to support the body on the rotating dolly. The answer was to hang the back of the body on ratchet straps from the hoist. The dolly could then be removed leaving the bumper mounting brackets clear.  So, full of anticipation, I took the new rear bumper and offered it up to the body, only to find that it would not fit around the car body. The bumper was, in fact, about 3cm too narrow. The ends of the bumper, that wrap around the body, just hit the body and would not pass along the sides of the car. 


Now these bumpers have no adjustment, so this left me scratching my head for a while before I decided to make them adjustable by cutting slots in the fixings behind the overriders, where they can't be seen. This involved converting the square holes into slots using a Dremel and small cutting discs. During the process of cutting these slots in both bumpers I got through 24 miniature cutting discs. 


Once cut, I could then extend the bumpers until they fit around the car body. As you can see, each side needed extending about 1cm. 

Once the bumper was extended I could then look at the problem of fixing the front ends of the bumper to the body. Now originally this was achieved by a bolt passing through the body, under the rear wing, then through a spacer and into a captive nut on the bumper. Now this presented another problem as the hole on one side had been plated and on the other side the wing had been replaced and there was no hole in the new part. So how to get the holes in the right places and how to get them level with no way of simply measuring the position.

After studying the problem I noticed that on the side that had been plated, I could still make out where the hole used to be. So I used a laser on a tripod to level the car on the hanging straps and then set the laser on the position of the original mounting hole. After that I moved the tripod to the other side and pointed the laser at the new wing and that gave me the correct position for the hole on that side. Now I could drill the two holes and mount the bumper on its brackets. Now, leaving the adjustable slot bolts loose, I could move the bumper ends until they lined up with the holes and, after making some new aluminium spacers, bolt the ends of the bumper to the body.

The story doesn't end here, because the rear bumper has two more mountings that fix behind the overriders directly to captive nuts on the body. Or at least they would if the fixings were there. But I had replaced the rear valance. The new valance had no fixings or holes and the support brackets had been cut off the old engine trays. Fortunately I had saved them. So I had to carefully cut the old brackets off the pieces of old engine tray then cleaned and rustproofed them and then welded new captive nuts into them. The next job was to get them in the right places. 

This was achieved by marking the holes through the bumper brackets onto the rear valance and then removing the bumper from the body again. I could then drill the holes in the valence and then offer the renovated brackets and bolt them in place through the new holes. I could then weld the brackets in place and paint them and the Bumper could then go back on and it finally fits.

Now all I had to do was do it all over again for the front bumper, which of course did not fit either. But after cutting slots, drilling holes and making more spacers, the front bumper fits too. I think four days to fit two bumpers must be a record?

So one more job on this episode was to make and fit the support platform that is under the rear seat. Now I had some material left from the panel that I bought to replace the rear bulkhead and it already had pressing ribs in it to give it strength. After measuring the panel I found that I just had enough and so confidently measured and cut the piece out that I needed. I offered it in place and found that it fit perfectly. So now I had to bend it. I took it to my press only to find that it was too long to fit in the press. So I had to cut my perfect panel in half so that I could bend the front fold over on it. 

Well I soon discovered that bending a panel with pressing ribs in it on a small manual press is not easy, but eventually I managed to bend the two halves and then weld them into place in the body and paint them. 

So there it is in place. 

My next job is to repair the two kickboards under the rear seat, which have bad rot that needs cutting out and replacing. More about that on the next episode. 


Copyright 05.06.21 all rights reserved.

My Other Blogs:
1961 BSA A10 Super Rocket Motorcycle:
http://60sclassicmotorbikes.blogspot.com/2012/07/before.html

1961 Ariel Arrow Super Sport Motorcycle :
http://60sclassicmotorbikes.blogspot.com/2014/01/1961-aerial-golden-arrow-restoration.html

Miniature Land Rover Defender:
http://miniaturelandrover.blogspot.com/2016/02/1-miniature-land-rover-defender-idea.html?view=timeslide

Motorcycle Trailers / Caravans:
http://motorcycletrailersandcaravans.blogspot.com/2018/01/1-motorcycle-trailers-problem.html


Tuesday, 30 March 2021

19. Karmann Ghia Restoration - Body Prep


Well it's time for hours and hours of body preparation and some final welding.  So starting at the front of my Karman Ghia Convertible I began the slow process of rubbing down and filling. I decided to slowly work my way around the car and started with the front valance. Because this car has had so many replacement panels, blending in the joints between old and new panels required multiple layers of filler and shaping then more filler etc.

But slowly the car began to turn from orange to grey. One of the biggest problems was to get the two rear wings the same shape. As I mentioned before, this car had had accident damage on the  left side so when I stood at the back of the car and looked at the two rear wings, it was obvious that the right wing had a good bulbus curve on it and that the left rear wing was much flatter. Now the problem was how to replicate the curve on the right wing onto the left.


To achieve this I bought a long 20" Shape Gauge and used it to capture the shape of the right wing and then transferred the gauge over to the left wing and built up the filler over multiple layers until the gauge fitted over the curve the same on both wings.


The next big problem was the bulkhead panels behind the back seat and over the gearbox. After very long consideration of the possibilities of making patches for this panel, which was really badly perforated, I finally decided to buy a new panel and cut the areas out that needed replacing.

So out came the angle grinder again and large pieces of the new panel were grafted in.


You will notice that the step in front of the replaced panel, that supports the seat, is also in a bad way. So the next step was to cut this out too and fabricate a new one.

In recent weeks I have been approaching various paint sprayers with a view to finally getting the finished coat on the body. I have been amazed at the enormous differences between quotes, but I think that I have finally decided upon the right supplier.


One final bit is that my tyres have finally arrived and I was able to get them fitted to the wheels, but fitting the wheels is a long way away at the moment.

Thursday, 3 December 2020

18. Karmann Ghia Restoration - The Body Comes Home


Well, there were a couple more welding jobs to do, which includes slowly working our way around the body. So starting at the front there were two areas that needed attention on the front valance. This involved cutting away the lower corners, welding in new shaped metal and then sanding off the welds to give a smooth new finish.


The next stage was to make a start on rebuilding the bulkhead over the gearbox area. This particular area of metal is badly perforated but we decided that it made more sense to patch this area than try and replace the whole panel as it is under the car and over the gearbox and will never be seen. This will add more strength to the perforated areas, rather than cut them out and replace them. 


As you can see, the final result was very successful and there are several other small areas of this panel that will need similar attention once the body is back home in my workshop. 
As we moved around to the back of the car, one area that needed attention was the bottom corner of the rear boot seal area. As you can see from the photo, the metalwork in this area had completely rotted away and had previously been rebuilt with body filler. This involved making several templates for five different pieces to fabricate the missing bits.


After some very careful welding the rebuilt corner was finally in place. Now true to form, just as I think that we are making progress a major problem is discovered. 

After fitting the rubber seal and closing the engine cover lid, it was discovered that there was a 2cm difference between the body and the engine cover lid on opposite corners. After investigation it was revealed  that the whole left hand corner of the body had been pushed forward during a previous accident and instead of pulling it out during that repair, they had simply made up the difference with vast thicknesses of body filler. Now with the filler removed the true extent of the damage was revealed. 

The very hard decision was made to turn the body back upside down, cut all of the welds to all of the panels in the rear quarter, including the engine compartment and then use a hydraulic ram to push the offending rear panel out to the correct position so that the engine compartment lid fit properly. This was done and then all of the connecting panels were rewelded. This whole process took 6 hours to do, but at least it is now right.


Well only two more bits to do and then the body can be transported back to my workshop, and that is fitting the headlight bowls. This involved some very delicate TIG welding so that the welds did not interfere with the headlight rims.


So after two and a half years, at last, the body was transferred onto the transporter and it was on it's way home! 


With the body finally back home, I can now concentrate on preparing the body for paint. This will require a good deal of preparation on the underside before progressing to the upper bodywork. I'm under no illusion, the first and worst job will be to remove 50 year old underseal from the original panels that have not needed replacing and I am sure that this will reveal more holes and more welding needed. 


The process for preparing under the car is as follows: 
Remove old underseal with a heat gun and scraper. 
Rotary wire brush to remove remaining debris and rust.
Treat with rust killer (Black)
Seam Seal all joints
Spray with deep etch undercoat paint (grey)
Spray with Stone Chip paint. (White)

When the car finally goes to the paint shop it will receive a full undercoat over all surfaces and then a final top coat colour.

Well that's it for now, much more to come.

You can contact me on hopcroftscoot@gmail.com

Copyright 03.12.20 all rights reserved.

My Other Blogs:
1961 BSA A10 Super Rocket Motorcycle:
http://60sclassicmotorbikes.blogspot.com/2012/07/before.html

1961 Ariel Arrow Super Sport Motorcycle :
http://60sclassicmotorbikes.blogspot.com/2014/01/1961-aerial-golden-arrow-restoration.html

Miniature Land Rover Defender:
http://miniaturelandrover.blogspot.com/2016/02/1-miniature-land-rover-defender-idea.html?view=timeslide

Motorcycle Trailers / Caravans:
http://motorcycletrailersandcaravans.blogspot.com/2018/01/1-motorcycle-trailers-problem.html